Preserve your Hi-8 and VHS memories by converting them to digital movies and saving them to DVD or SSD before the tapes wear out for good. My wife and I bought a Sony Handycam many years ago when our kids were young, to capture video as they grew up (this was before smart phones were much of a thing). It records on Hi-8 video cassettes in analog format, and I needed a way to convert those recordings into digital movies and save them to a more permanent format like DVD or to the cloud.
The Sony Handycam (model number CCD-TRV22) has RCA outputs for video and mono audio, and I used an EasyCAP USB2.0 Video Capture VHS-to-USB Adapter to convert the analog Hi-8 recordings into digital movies.
The Easycap adapter plugs into the RCA jacks on the Sony Handycam (I used the white line for the single audio jack), and the USB jack plugs into my laptop. Also bundled with the adapter is a licensed copy of ULead Video Studio 8.0 for creating and editing movies.
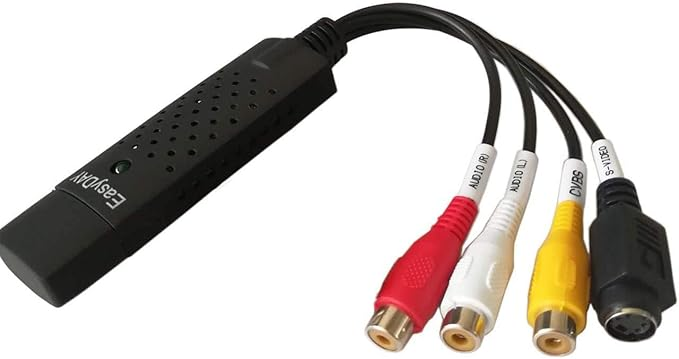
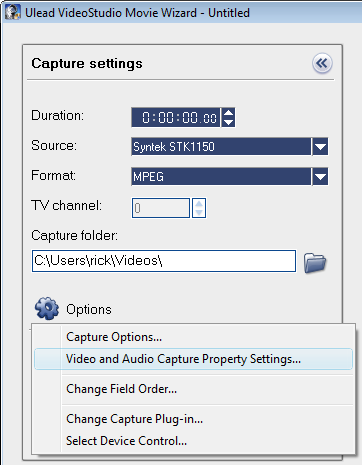
I had to use an RCA patch cable between the female adapter jacks and the camcorder, just like you would between a VCR and your TV. In fact, this adapter could also be hooked up to a VHS VCR (yep, I still have one), to make digital copies of old VHS movies. Once I hooked up the camcorder with my laptop using the EasyCap usb adapter, I ran the Ulead Movie Wizard software that came with the adaptor and selected the "Capture" menu. I put the camcorder in Player mode, loaded the video tape and pressed play. Then I pressed "Capture Video" in the Ulead program, and received an error indicating that no input signal could be found. The reason was the video capture options are set by default to record from Video Tuner and I was using a video camcorder with RCA (composite) outputs. I clicked "Options" and then selected "Video and Audio Capture Property Settings" to change this setting:
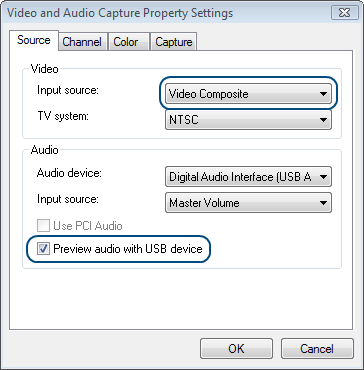
I changed the video input source to "Video Composite" and also checked the option to "Preview audio with USB device" (otherwise you won't hear any sound while it's recording).
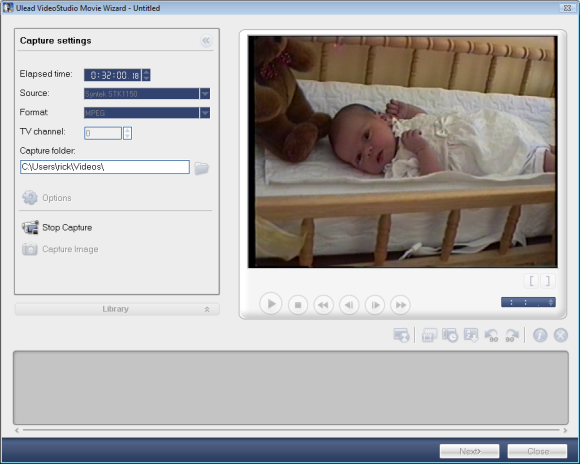
After making these changes and rewinding the tape in the camcorder, I repeated the steps of playing the camcorder and then pressing "Capture Video" in the Ulead software. This time it worked perfectly, capturing audio and video and saving it into AVI digital video format. I also tried a few other video file formats, to see which one would give the best video quality and screen capture size (AVI records extremely large file sizes, as much as 6 GB for a 4 minute video clip!) I tried the mpeg and DVD recording formats, and found that the DVD format recorded a very small window (320 pixels wide), whereas the mpeg format could be set to a larger screen size (up to 700 x 576). I ended up using the MPEG video format, which results in much smaller files than the AVI format.
This affordable video capture adapter works great, produces high quality video and audio recording, and the software it comes with is worth more than the purchase price alone. Overall, this was a smart purchase and will let me backup and preserve the precious memories of our children's births, school events, vacations, holidays, and birthdays. I have a dozen or so tapes to backup, and a week of vacation coming up next week for Christmas - couldn't be any better timing.
Leave a comment